API Documentation | ZenHR
Overview
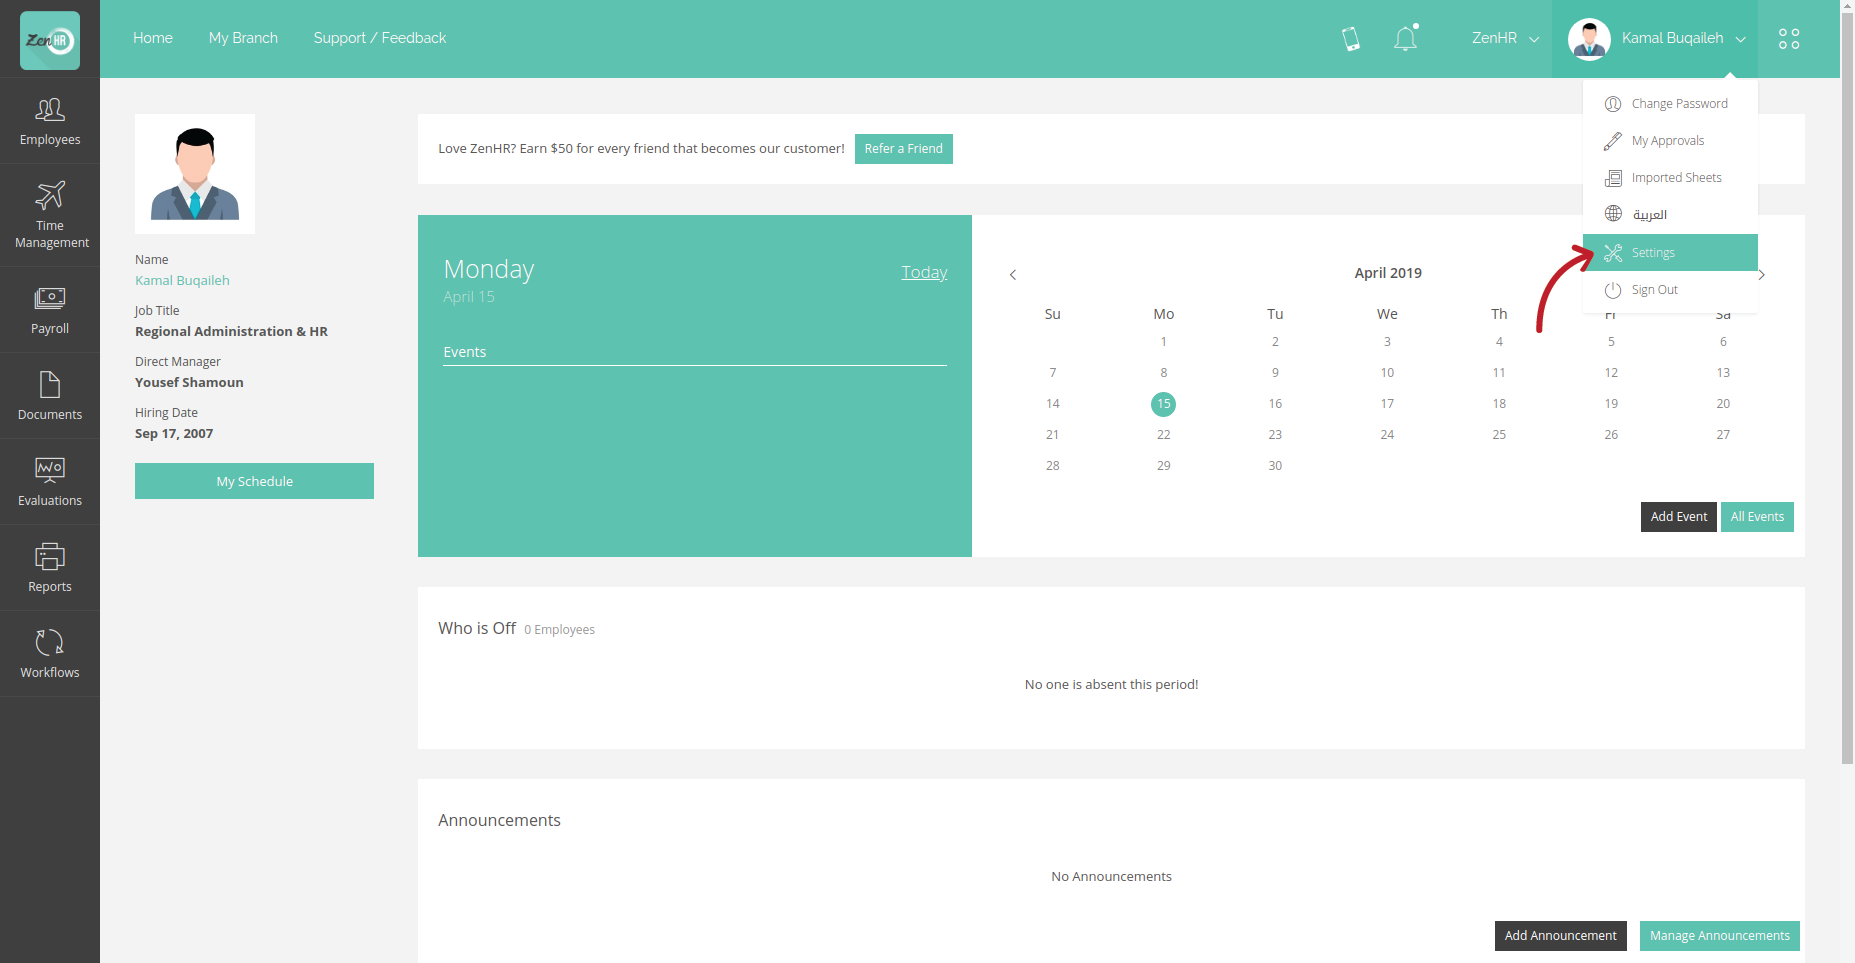
Getting started
-
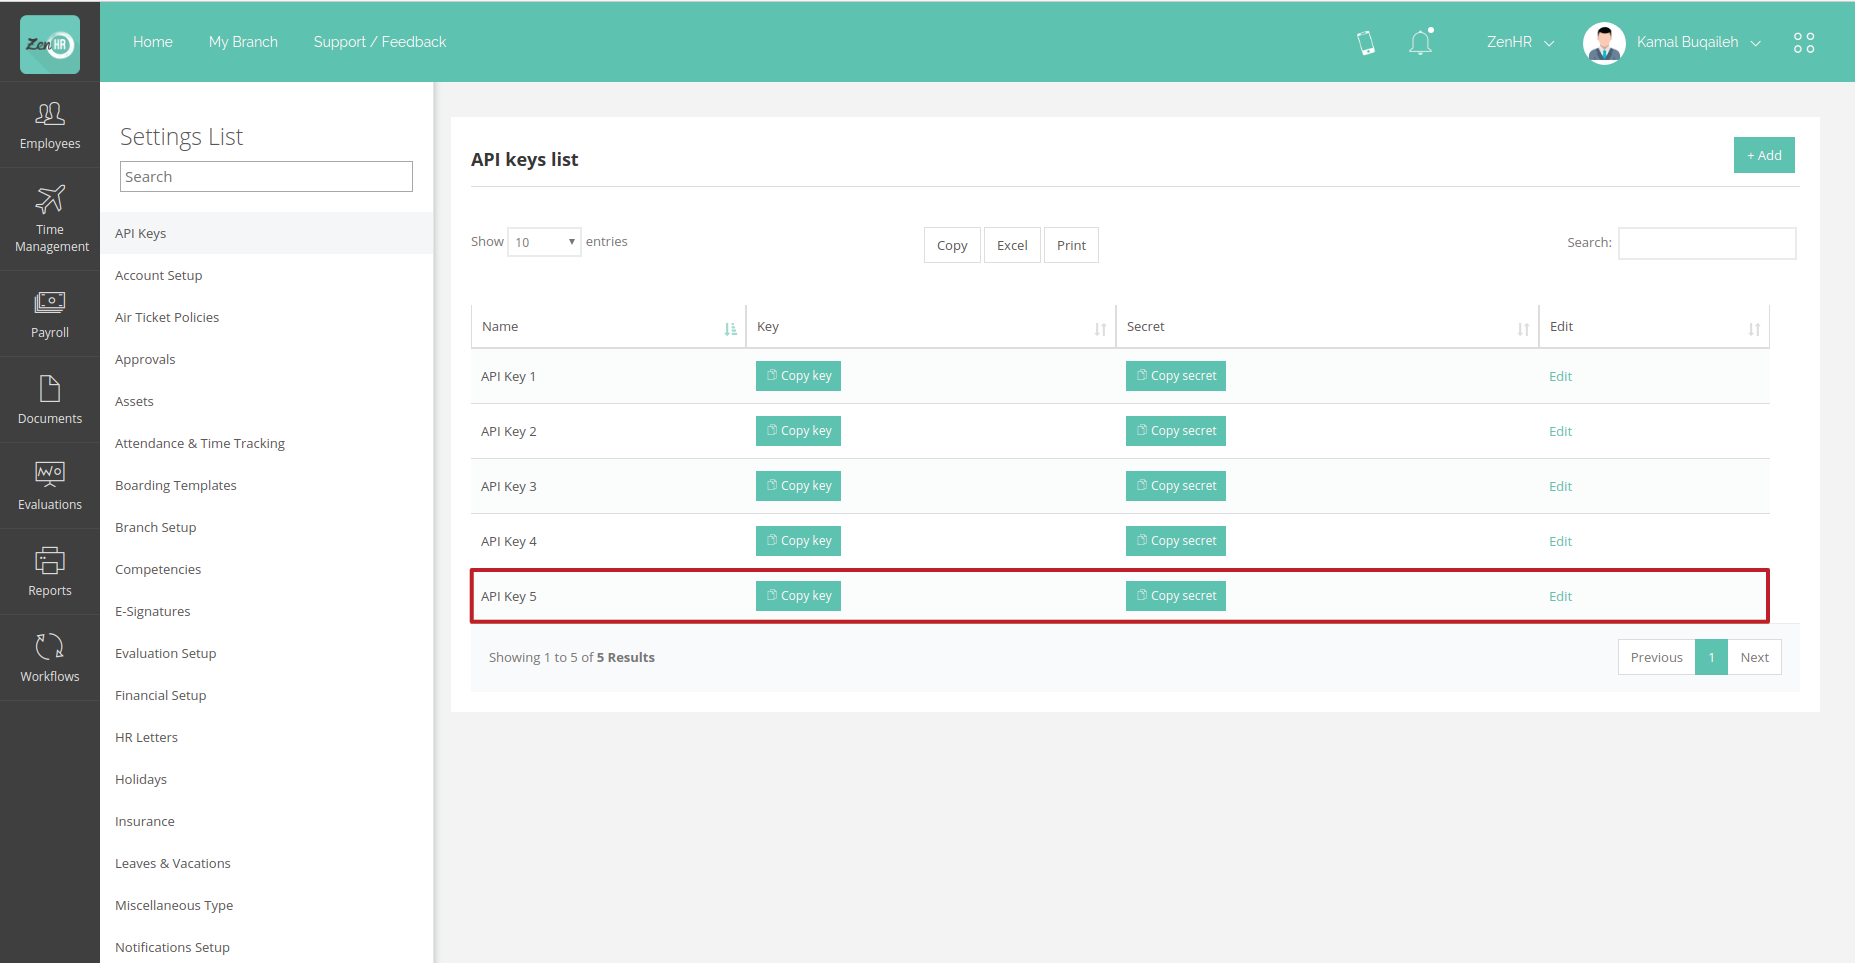
Go to settings
-
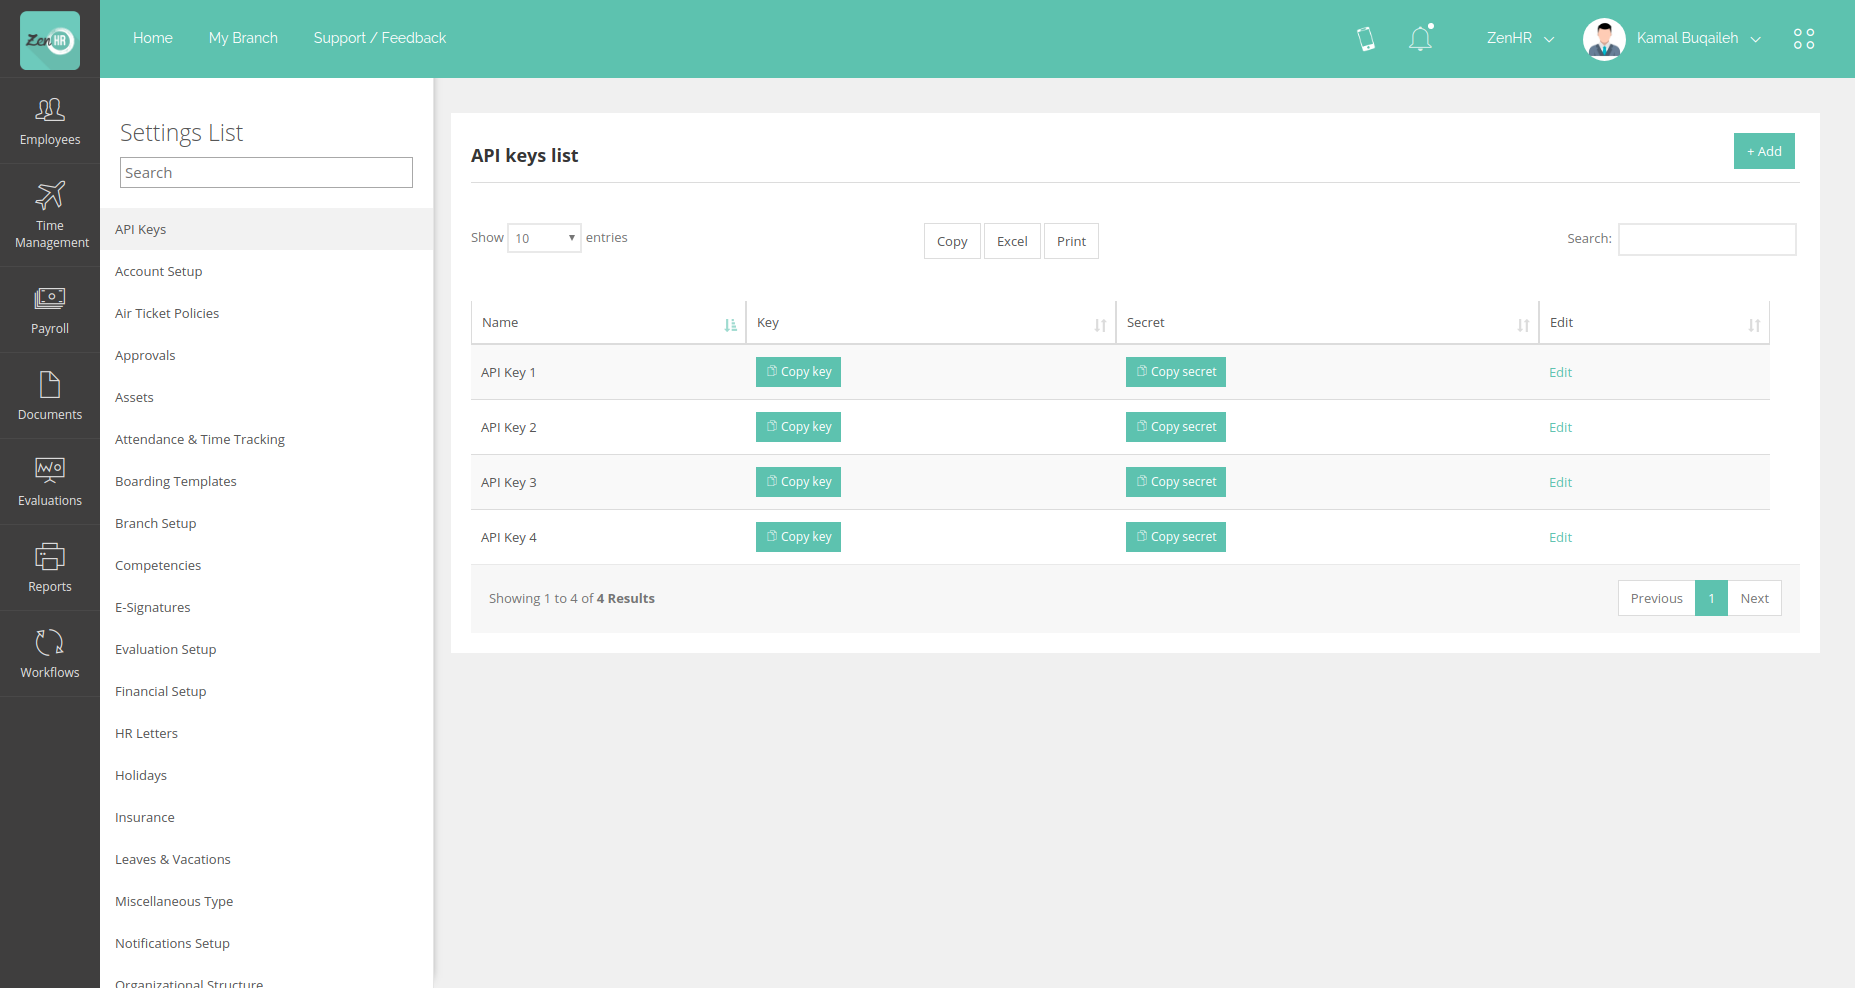
Select API Keys tab
-
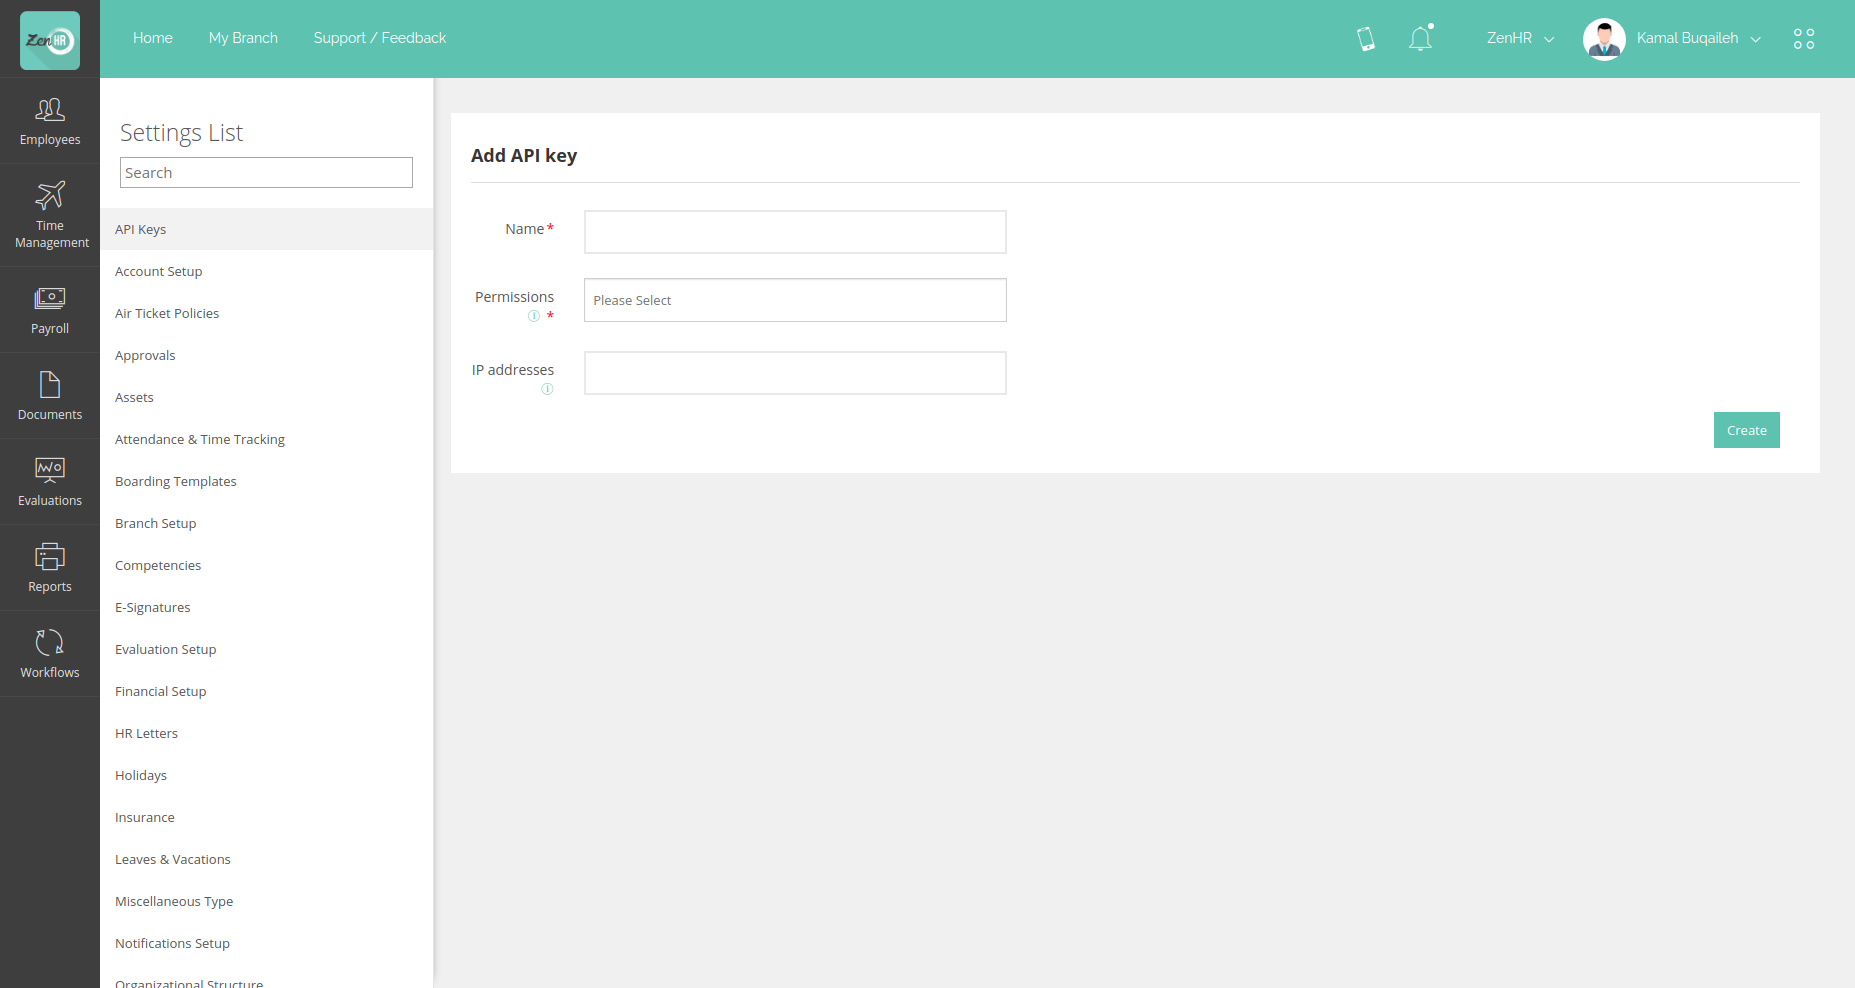
Click on (+ Add) button to add new key and secret
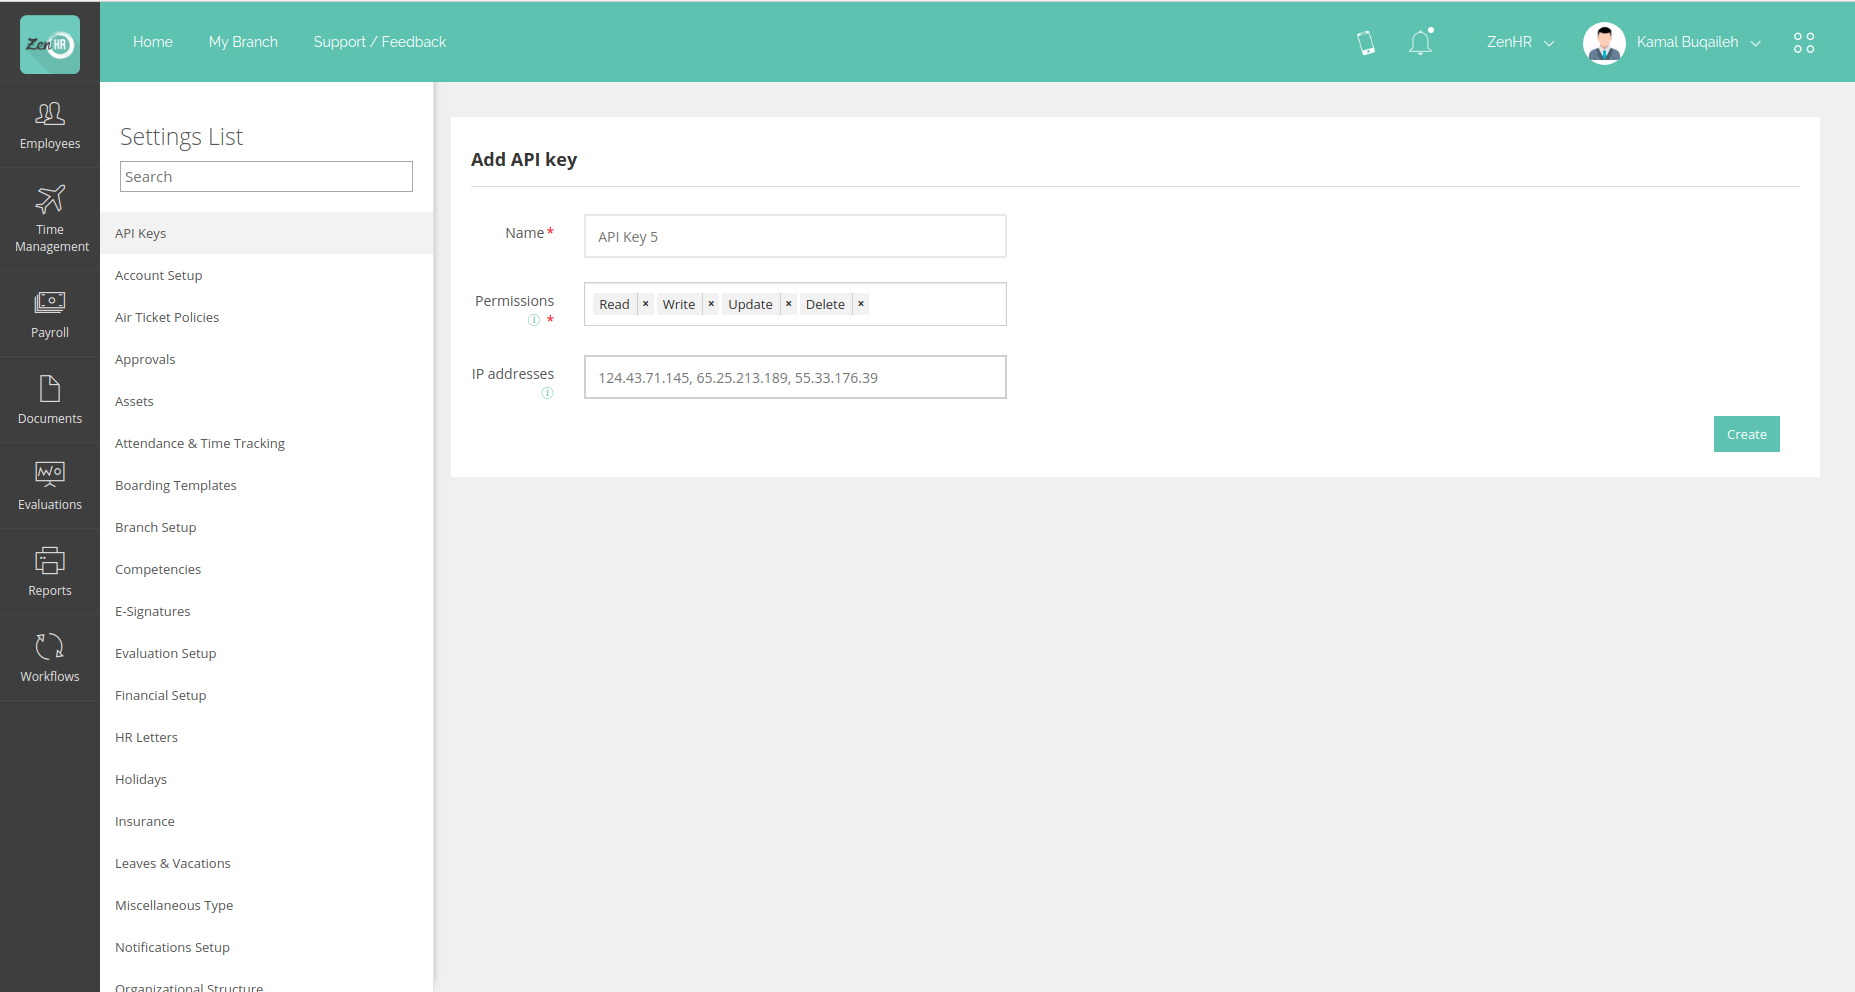
- The Name field is just a label to let you know which API Key is used for which integration
- The Permissions field will be used to identify your allowed actions in your requests to ZenHR
- The IP Addresses field is optional, however; we highly recommend adding them, in that case we will not accept any request to your account other than the ones that come form your IP Addresses
Note: The IP Addresses must be splitted by comma in case you wanted to enter more that a single IP Address
-
After Filling your fields, click on create to generate you API Keys
-
Now That you have created you API Key successfully click on Copy Key and Copy Secret to copy them
Authentication
In every request you make to ZenHR you need to do add your key to the header
You should note that you have a limit of 500 request everyday.
Encoding and Decoding
Ruby:
Install JWT Gem
sudo gem install jwt
hmac_secret = 'YOUR SECRET'

token = JWT.encode payload, hmac_secret, 'HS256'

puts token
# eyJhbGciOiJIUzI1NiJ9.eyJkYXRhIjoidGVzdCJ9.pNIWIL34Jo13LViZAJACzK6Yf0qnvT_BuwOxiMCPE-Y

decoded_token = JWT.decode token, hmac_secret, true, { algorithm: 'HS256' }

puts decoded_token
# Array
# [
#   {"data"=>"test"}, # payload
#   {"alg"=>"HS256"} # header
# ]
PHP:
install JWT using Composer
composer require mishal/jwt
<?php
/*
 * This file is part of Jwt for Php.
 *
 * For the full copyright and license information, please view the LICENSE
 * file that was distributed with this source code.
 */

require_once __DIR__ . '/../vendor/autoload.php';

use Jwt\Jwt;
use Jwt\Algorithm\HS256Algorithm;

$token = Jwt::encode('string', $alg = new HS256Algorithm('secret'));

echo $token; // eyJ0eXAiOiJKV1QiLCJhbGciOiJIUzI1NiJ9.eyJkYXRhIjoic3RyaW5nIn0.RncJbCyf4zd0pu1N02u_rKwEezkmd94r3i5sWLk1ceU

// decode, you must passed allowed algorithm(s) to prevent attackers to control the choice of algorithm
$decoded = Jwt::decode($token, ['algorithm' => $alg]);

echo $decoded['data']; // 'string'
PYTHON
import chilkat

#  Demonstrates how to create an HMAC JWT using a shared secret (password).

#  This example requires the Chilkat API to have been previously unlocked.
#  See Global Unlock Sample for sample code.

jwt = chilkat.CkJwt()

#  Build the JOSE header
jose = chilkat.CkJsonObject()

success = jose.AppendString("alg","HS256")
success = jose.AppendString("typ","JWT")

#  Now build the JWT claims (also known as the payload)
claims = chilkat.CkJsonObject()
success = claims.AppendString("iss","http://example.org")
success = claims.AppendString("sub","John")
success = claims.AppendString("aud","http://example.com")

#  Set the timestamp of when the JWT was created to now.
curDateTime = jwt.GenNumericDate(0)
success = claims.AddIntAt(-1,"iat",curDateTime)

#  Set the "not process before" timestamp to now.
success = claims.AddIntAt(-1,"nbf",curDateTime)

#  Set the timestamp defining an expiration time (end time) for the token
#  to be now + 1 hour (3600 seconds)
success = claims.AddIntAt(-1,"exp",curDateTime + 3600)

#  Produce the smallest possible JWT:
jwt.put_AutoCompact(True)

strJwt = jwt.createJwt(jose.emit(),claims.emit(),"secret")

print(strJwt)
Parameters
By default we paginate data before responding to your request, the default is 10 records per page, you may change that by passing per_page param in the URL
example
https://api.zenhr.com/integration/v1/employees?per_page=15
since we are paginating the data, you need to specify which page you want to request using page param, if you did not pass this param we will respond with the first page
example
https://api.zenhr.com/integration/v1/employees?per_page=15&page=2
Requests and Respons
Every respons will be encoded, after decoding it you will have the following JSON object
{"current_page" => NUMBER, "per_page" => NUMBER, "total_number_of_records" => NUMBER, "total_pages" => NUMBER, "data" => JSON OBJECT}
| Key | Description |
|---|---|
| current_page | the page you are on, same as page parameter |
| per_page | the same as per_page parameter |
| total_number_of_records | the total number of all records, not the number of the records in current page |
| total_pages | total number of pages |
| data | JSON object with the requested data |
However not all responses will have this structure of respnose, for example when you request a specific record it will only return the data without the other params
In order to fetch data use GET method
Please note that the encoded payload which comes from us will be valid for only a 1 minute, after the 1 minute the payload will be invalid.
Ping
use this end point to test your integration.
curl --header "key: YOUR_KEY" --request GET https://api.zenhr.com/integration/v1/ping
when you make a successful request, ping will response with a payload which does not has an expiry time, so that you can test your decode method.
you should get the following after decoding the payload successfully
{ data: { ping: 'Pong' } }
Branches
In order to fetch all branches data
curl --header "key: YOUR_KEY" --request GET https://api.zenhr.com/integration/v1/branches
for a single branch
curl --header "key: YOUR_KEY" --request GET https://api.zenhr.com/integration/v1/branches/BRANCH_ID
Employees
In order to fetch all employees data
curl --header "key: YOUR_KEY" --request GET https://api.zenhr.com/integration/v1/employees?branch_id=BRANCH_ID
for a single employee
curl --header "key: YOUR_KEY" --request GET https://api.zenhr.com/integration/v1/employees/EMPLOYEE_ID?branch_id=EMPLOYEE_BRANCH_ID
Professional data
In order to fetch all employees professional data
curl --header "key: YOUR_KEY" --request GET https://api.zenhr.com/integration/v1/professional_data?branch_id=EMPLOYEE_BRANCH_ID
to get all professional data for a single employee
curl --header "key: YOUR_KEY" --request GET https://api.zenhr.com/integration/v1/employees/YOUR_EMPLOYEE_ID/professional_data?branch_id=EMPLOYEE_BRANCH_ID
to get the current professional data for a single employee
curl --header "key: YOUR_KEY" --request GET https://api.zenhr.com/integration/v1/employees/YOUR_EMPLOYEE_ID/professional_data/active?branch_id=EMPLOYEE_BRANCH_ID
Financial data
In order to fetch all employees financial data
curl --header "key: YOUR_KEY" --request GET https://api.zenhr.com/integration/v1/financial_data?branch_id=EMPLOYEE_BRANCH_ID
to get all financial data for a single employee
curl --header "key: YOUR_KEY" --request GET https://api.zenhr.com/integration/v1/employees/YOUR_EMPLOYEE_ID/financial_data?branch_id=EMPLOYEE_BRANCH_ID
to get the active financial data for a single employee
curl --header "key: YOUR_KEY" --request GET https://api.zenhr.com/integration/v1/employees/YOUR_EMPLOYEE_ID/financial_data/active?branch_id=EMPLOYEE_BRANCH_ID
Financial transactions
In order to fetch all employees financial transactions
curl --header "key: YOUR_KEY" --request GET https://api.zenhr.com/integration/v1/financial_transactions?branch_id=EMPLOYEE_BRANCH_ID
to get all financial transactions for a single employee
curl --header "key: YOUR_KEY" --request GET https://api.zenhr.com/integration/v1/employees/YOUR_EMPLOYEE_ID/financial_transactions?branch_id=EMPLOYEE_BRANCH_ID
Salaries
In order to fetch all employees salaries
curl --header "key: YOUR_KEY" --request GET https://api.zenhr.com/integration/v1/salaries?branch_id=EMPLOYEE_BRANCH_ID
to get all salaries for a single employee
curl --header "key: YOUR_KEY" --request GET https://api.zenhr.com/integration/v1/employees/YOUR_EMPLOYEE_ID/salaries?branch_id=EMPLOYEE_BRANCH_ID